How to Set up Approval Workflows

How to configure complex approval scenarios with just a few clicks
What makes ApprovalMax such a powerful tool for designing complicated approval workflows without a single line of coding?
- Multi-step approval workflows
- Approval rules that can be adjusted for each step with the help of the “approval matrix”
We hate paper
You probably have already tried to design an approval process on paper. And, most likely, you didn’t find it to be a pleasant experience. Often, approval workflow rules are quite complicated and require a certain methodology to be described.

ApprovalMax provides not just an approval workflow engine, but a clear and intuitive way to describe any approval workflow.
Not on paper, but in a top-notch tool with a maximum of automation.
Let’s set up your approval workflows in ApprovalMax!
Multi-step approval workflow
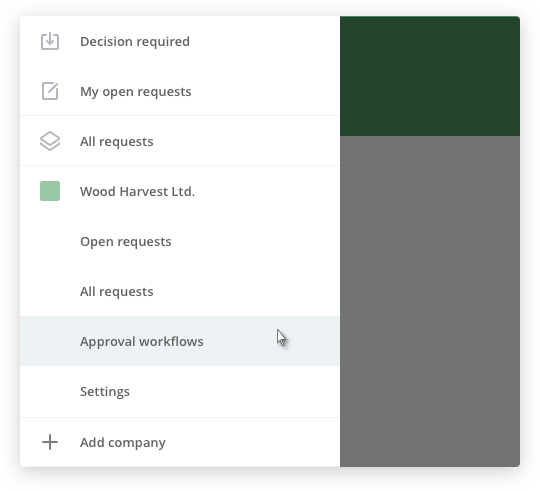
Open the left navigation panel and click on “Approval workflows”.

You can select one of the predefined approval workflows or create a new one from scratch.
Xero workflows allow you to set up workflows for Xero documents such as Bills, Sales Invoices, or Purchase Orders.
Let’s set up an approval workflow for Xero Bills.
- Select the person who will be the requester of all Bills pulled from Xero
- Add the Approvers for your first step; they will approve in parallel
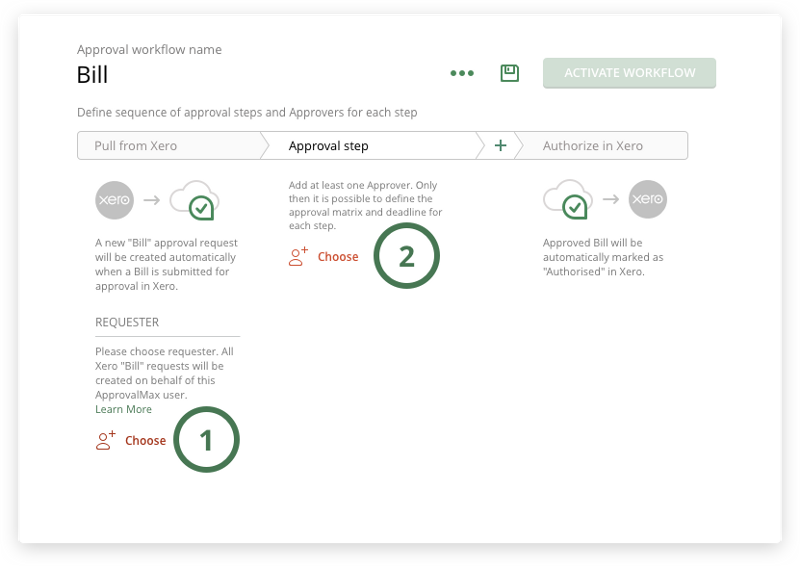
Add approval steps by clicking on the “+” icon in the workflow. The Approvers in the second step will get the approval request after it has been approved by all Approvers in the first step
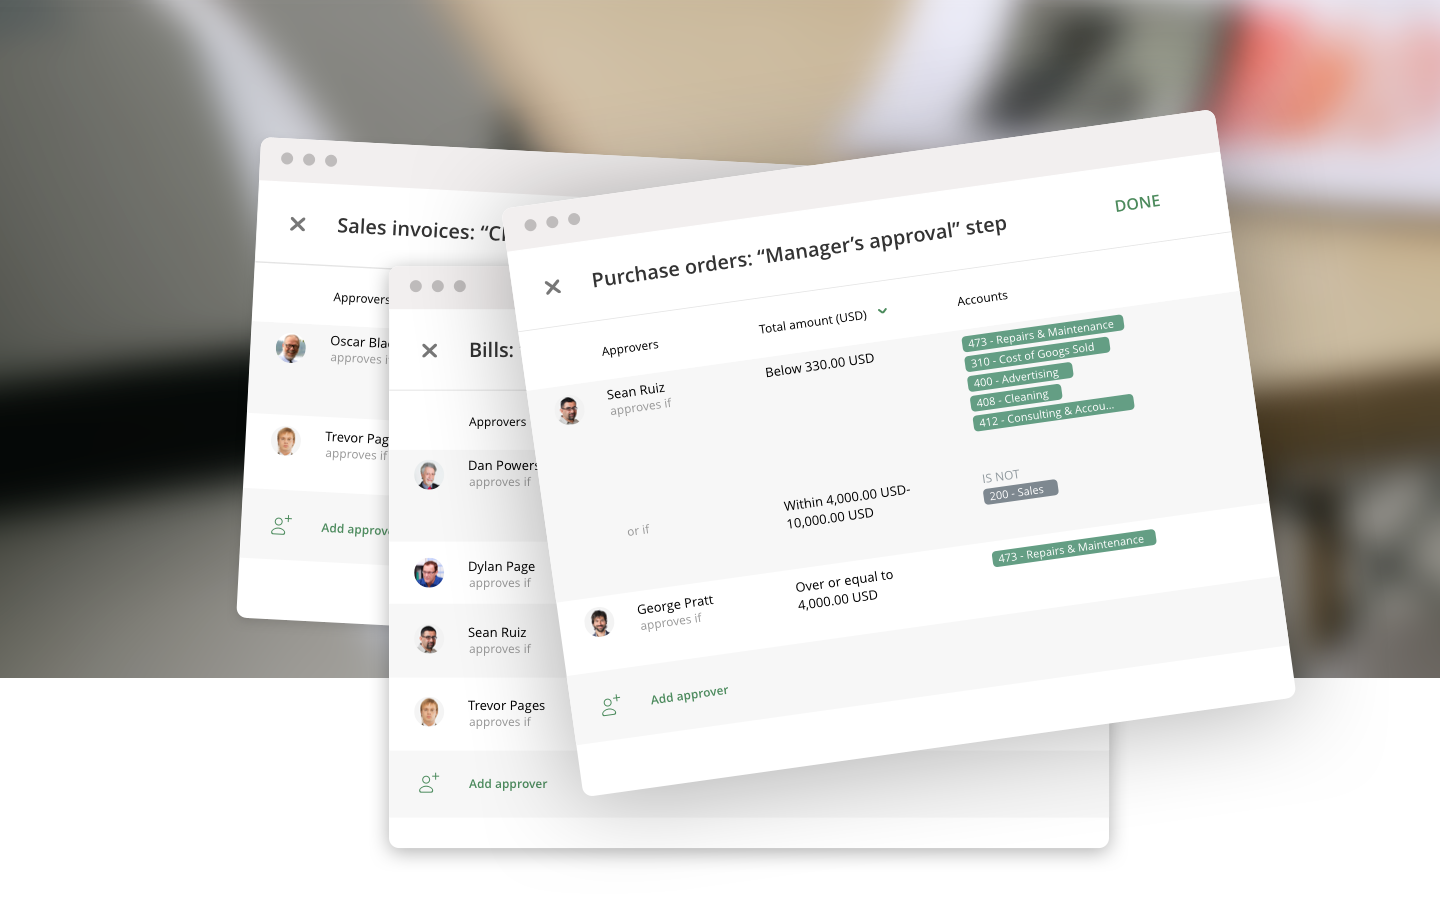
Applying business rules to the approval matrix

Once you’ve added the Approvers to a step, you’ll see a panel appear underneath the step name. This is where the magic starts.
- The “Add a person” icon lets you add more Approvers to this step
- The “Table” icon opens the approval matrix
- The “Alarm clock” icon enables you to set a deadline for this step (days, hours).
Now, let’s click on the “Table” icon or on the rule below the Approver’s name (e.g. “Always approves”).

A popup opens with the approval matrix, which defines who should be added as an Approver to a particular Bill based on its details.
Rules for Xero Bills, Purchase Orders, or Sales Invoices can be set based on the values in Xero: Accounts, Suppliers, Items, Customers, etc.
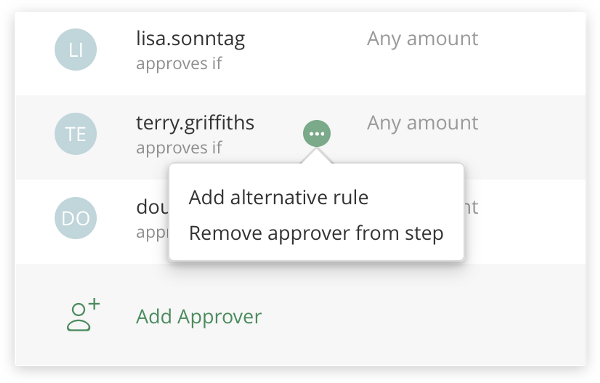
Alternative rules
Alternative rules for an Approver can be added in each step; meaning “OR”.
This way, you can set complex rules such as Terry approves if “Amount is below 500 USD and Account is 568” OR “Amount is below 10,000 USD”.
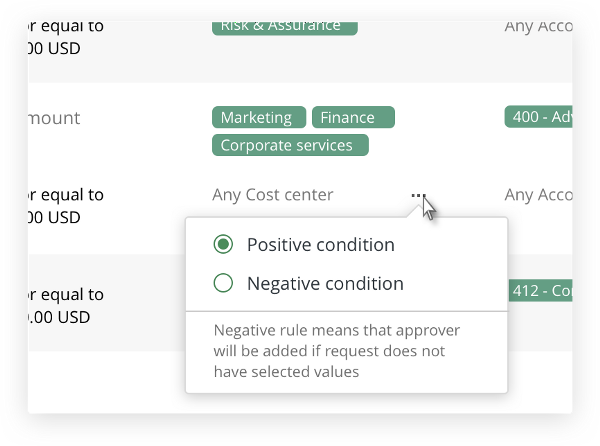
Negative conditions
Negative conditions help defining rules such as “Mike approves Bills that are NOT from Coca-Cola Company”.
With all rules in place, your workflow should look like this:
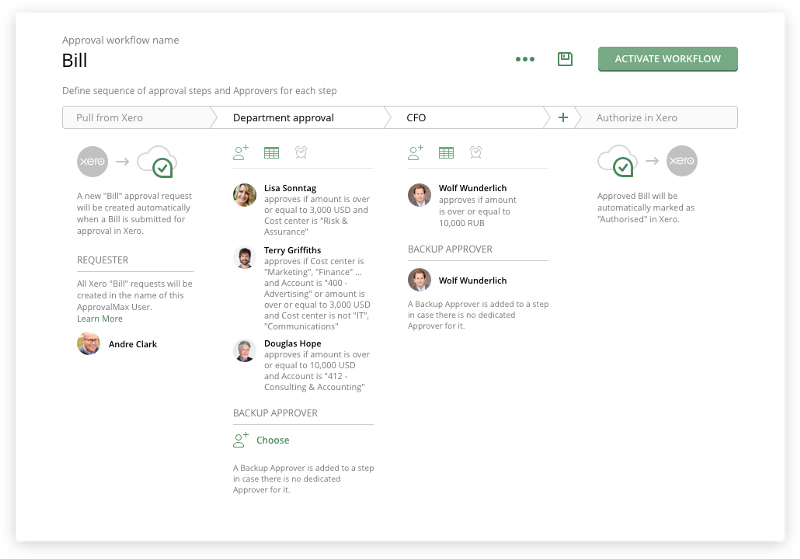
You can also add a Default Approver to those steps that don’t have an Approver with the rule “Always approves”. Learn more about Default Approvers.
When you’re happy with your workflow, hit “Activate workflow”.
Now, all documents submitted for approval in Xero will be pulled to ApprovalMax and pass through your approval workflow.
Do you have questions? Email us at info@approvalmax.com or register for our next webinar: for UK & US and for AU & NZ.
Want to give it a try? Sign up for our 30‐day free trial.
Find us on Facebook and Twitter.
Read our knowledge base on Uservoice.
Yours,
ApprovalMax Team